Painting a Watercolor Portrait of a Boy
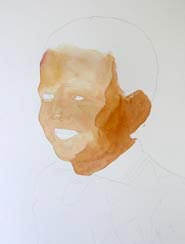
Drawing and first wash
A child is innocent, tender and sweet. Here is a demonstration of my method of painting a watercolor portrait of a child.
For a portrait painting, I usually start with a good pencil drawing. This is the step where I plan the composition; sort out the perspective, relationships, proportion and balance, size and distance. A good drawing is a good base for a painting; it can give you more confidence, so take as much time as you need to in this step.
I used a number 14 round brush to start the wash from the top of the forehead and moved down. This base wash help me created a soft, blended base of colors for this painting. Notice that I left some spots untouched. They were for the eyes and teeth. Then I introduced the second layer of color to define the shadow of the face with a wash of brunt umber.
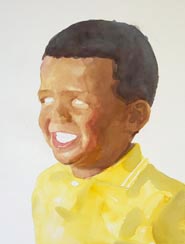
Working on the balance
Once the paint on the face was mostly dry, I started again from the top with burnt sienna, and then introduced some burnt umber for the hair on the forehead. I was still using the same number 14 round brush.
When the areas of head dried, I started to establish the shapes of the head with burnt umber and red.
I was not hurry to paint into the eyes and the mouth yet. Remember that the relationship needs to come first before the details of the portrait painting.
Then I used yellow to wash into the area of the shirt. I mixed yellow with small among of burn umber and blue to define the shadows.
At this point, I like to add darker-value colors to the painting to further define the forms. I started with the hair, moved to the eyes, the corners of the mouth. I mixed red and burnt umber for the areas around the mouth and nose. This was also a good time to work into adding more details to the garment.
I gently lifted the reflected area under the chin, and added a little yellow color as the reflected color from the yellow shirt.
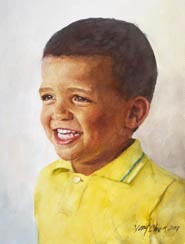
Proceed to the details
With mostly red and burnt umber, I worked into the middle tones. I didn't stay working in one area for long. I usually spend 10 seconds here, then 10 seconds there. It is important to keep your attention on the overall painting, paying attention to the color temperature and balance while you work into the smaller areas.
Now it's the time finally do the final touch to the eyes, the mouth and the area of the ear.
In the background, I used a light wash of blue and burnt umber without mixing, to the left side. For the right side, I used yellow and burnt umber and a little of blue. This would make the background enhance the main subject of the portrait painting.